

In this short blog post I will share with you how easily, with just a few lines of code, you can add OData to your ASP.NET Core WebAPI.
What is OData?
According to odata.org OData (Open Data Protocol) is an ISO/IEC approved, OASIS standard that defines a set of best practices for building and consuming RESTful APIs. OData helps you focus on your business logic while building RESTful APIs without having to worry about the various approaches to define request and response headers, status codes, HTTP methods, URL conventions, media types, payload formats, query options, etc. OData also provides guidance for tracking changes, defining functions/actions for reusable procedures, and sending asynchronous/batch requests.
In short, it allows you to consume a REST API in a more future-proof way by giving you easy access to selecting, filtering, sorting and etc. We will see how in a bit.
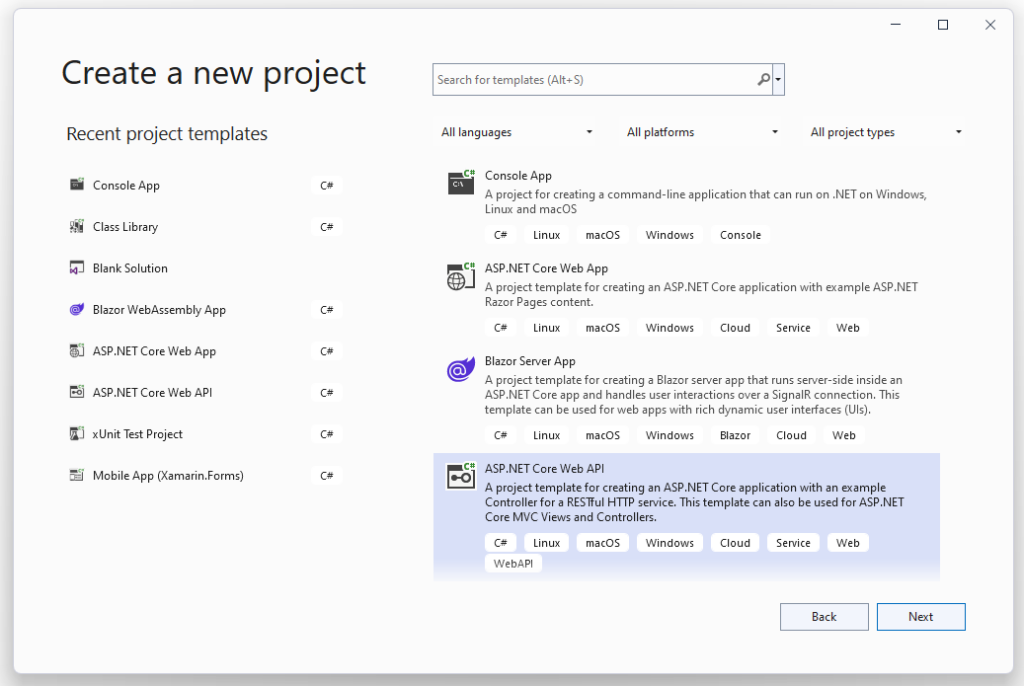
Create new ASP.NET Core WebAPI project
RUN the project
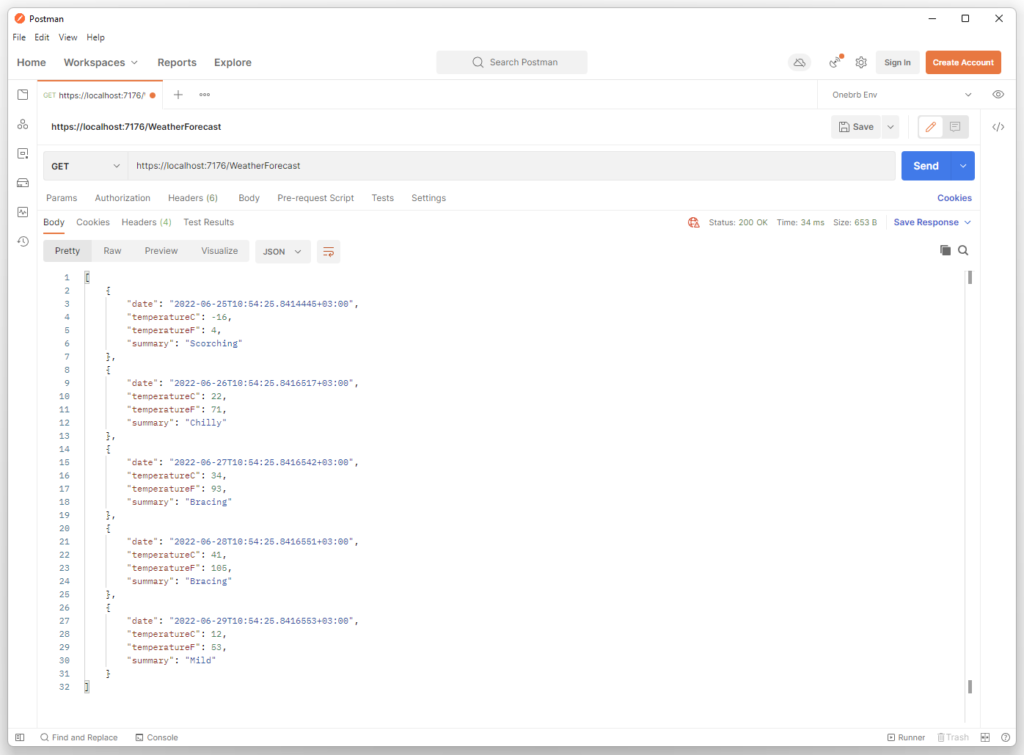
By default the project comes with an WeatherForecastController and thus we’ll have an endpoint like this https://localhost:7176/WeatherForecast (your port will most likely be different, so change it)
Use Postman
We’ll be using Postman to hit the API. If you don’t know what Postman is then it’s pretty much a very powerful tool that allows you to hit API endpoints, using authentication tokens and what not. For our basic purposes, though, we’d use it to hit our API with requests.
Let’s use it now to hit our API endpoint.
This is the default, now let’s install OData and see what it helps us accomplish.
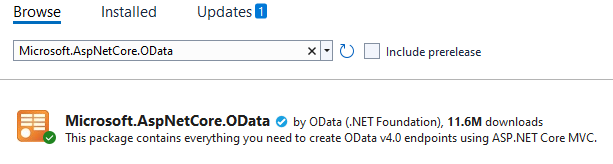
Install Microsoft.AspNetCore.OData
Install the Microsoft.AspNetCore.OData nuget package
Update Program.cs
Update builder.Services.AddControllers() like so:
builder.Services.AddControllers().AddOData(options => options.Select().Filter().OrderBy());
Now with only this simple line of code our Web API got new OData powers, how COOL is that? A single line of code for something THAT powerful as we will see in a bit. Thank you .NET Team!
Update WeatherForecastController
Add [EnableQuery()] attribute to the Get() action method, like so:
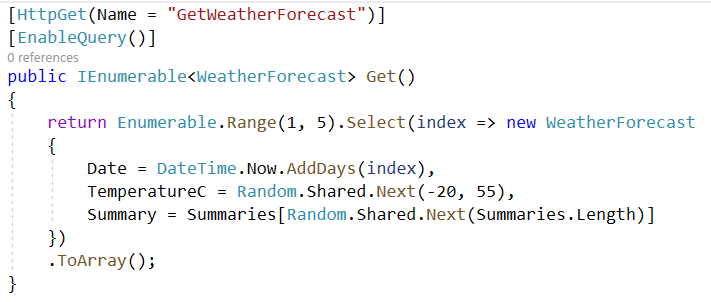
And that’s it! With only two or three lines of code in total we now have the OData capabilities at our disposal. So let’s now see what this gives us.
Start the Web API again
If we hit the endpoint again nothing changes, it’s the same as it was before.
Let’s change the endpoint a bit by adding a select like so:
https://localhost:7176/WeatherForecast?$select=summary
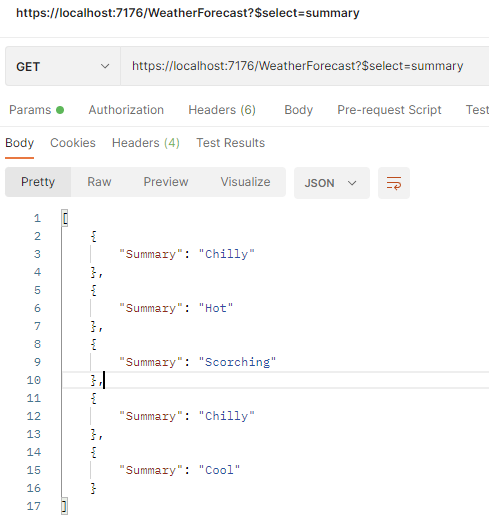
Now we told the API that we want only the summary. And without any modifications to the business logic it gave us what we wanted. Awesome!
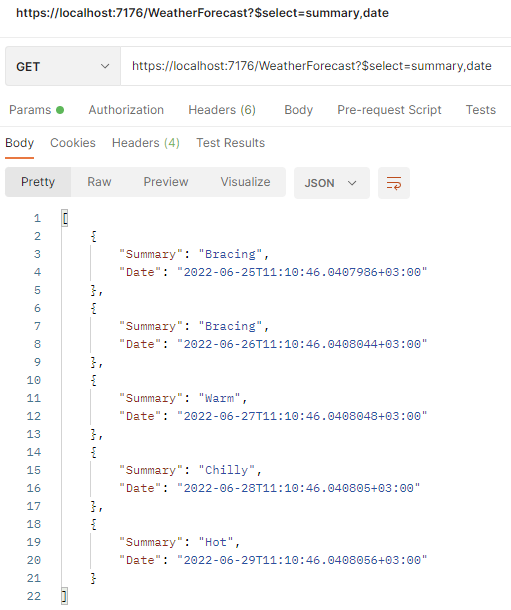
We could even use combinations of fields.
SELECT
Selecting the results
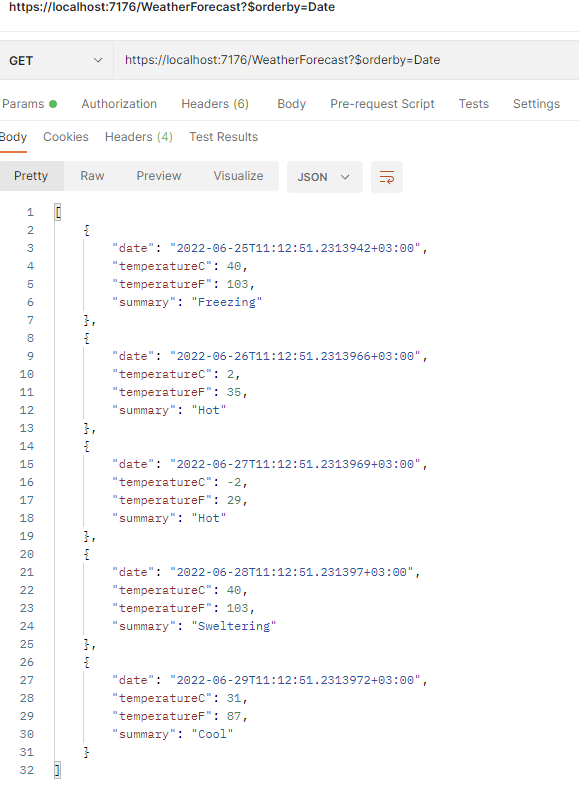
ORDER BY (ASC)
Ordering the results
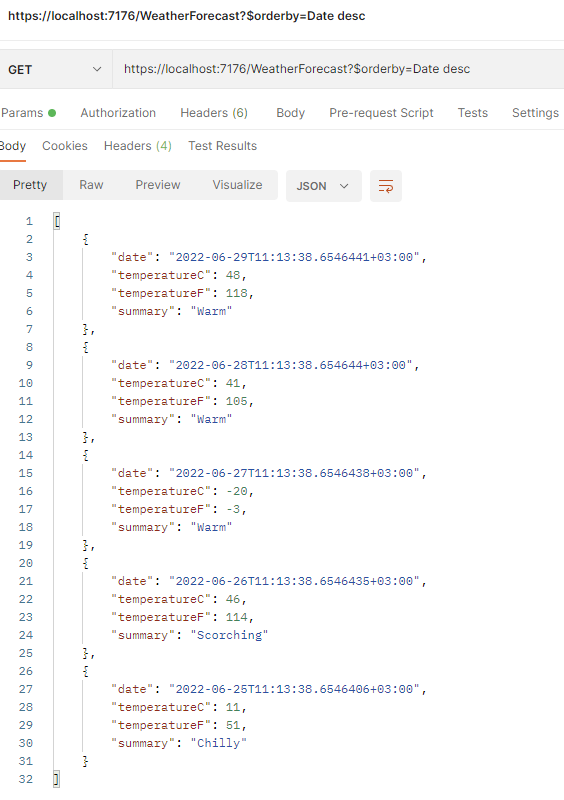
ORDER BY (DESC)
FILTER
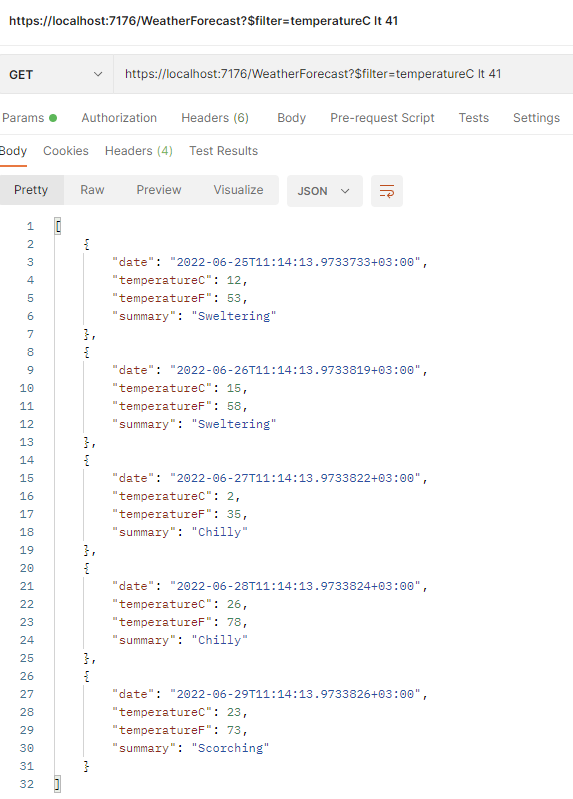
Filtering the results
I hope that by now you see the true power of OData. This is just a simple example, but it can get really complex and powerful depending on your case.
And we, as .NET developers, get this functionality with next to zero hassle, as you see, with just a few simple lines of code.
Without OData you would have to make different endpoints or to modify the existing ones every time a new business requirement comes along. OData gives you the flexibility you and your clients need so you don’t have to redeploy every time a client wants to sort by something or select only a few concrete fields while skipping others.
By the way, pagination, skipping and etc. works like a charm with OData, but I will leave this for you to research.
So, that’s it! I hope you liked OData and that you’d use it in the future as it really makes our lives way easier.
Thank you for reading.


