
In this short blog post I will show you how easy it is to get up and running with ASP.NET Core 2 and IdentityServer4.
First things first – What is JWT?
From JWT’s website:
JSON Web Token (JWT) is an open standard (RFC 7519) that defines a compact and self-contained way for securely transmitting information between parties as a JSON object. This information can be verified and trusted because it is digitally signed. JWTs can be signed using a secret (with the HMAC algorithm) or a public/private key pair using RSA or ECDSA.
Well… that sounds a little bit too techy and complex. In short, JWT allows for data to be available in exchange for a valid token.
Here is a super basic illustration of a client accessing a protected resource, in this case a list of users, using a GET request and a JWT token.
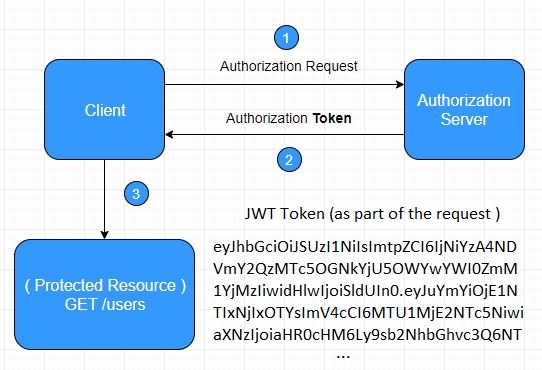
Accessing protected resource with JWT Token
- In our case, the authorization server is going to be an ASP.NET Core app that uses IdentityServer4 – an OpenID Connect and OAuth 2.0 framework for ASP.NET Core 2. OAuth 2.0 is industry-standard protocol for authorization and OpenID Connect is an authentication layer on top of it. And since these two are very complex things by themselves we are happy that the creators of IdentityServer4 give us a simple interface that allows us to use all this without much hassle.
- The client is the application that we are going to use for making requests to our API and to our Authorization Server. In our case the client would be Postman – a very handy tool for accessing APIs.
- The protected resource is going to be ASP.NET Core App with fake users data that we are going to access using JWT.
Just as an example, here is what a JWT token actually looks like:
eyJhbGciOiJIUzI1NiIsInR5cCI6IkpXVCJ9.eyJzdWIiOiIxMjM0NTY3ODkwIiwibmFtZSI6IkpvaG4gRG9lIiwiaWF0IjoxNTE2MjM5MDIyfQ.SflKxwRJSMeKKF2QT4fwpMeJf36POk6yJV_adQssw5c
Now, let’s begin our journey by creating our Authentication Server – a simple ASP.NET Core API.
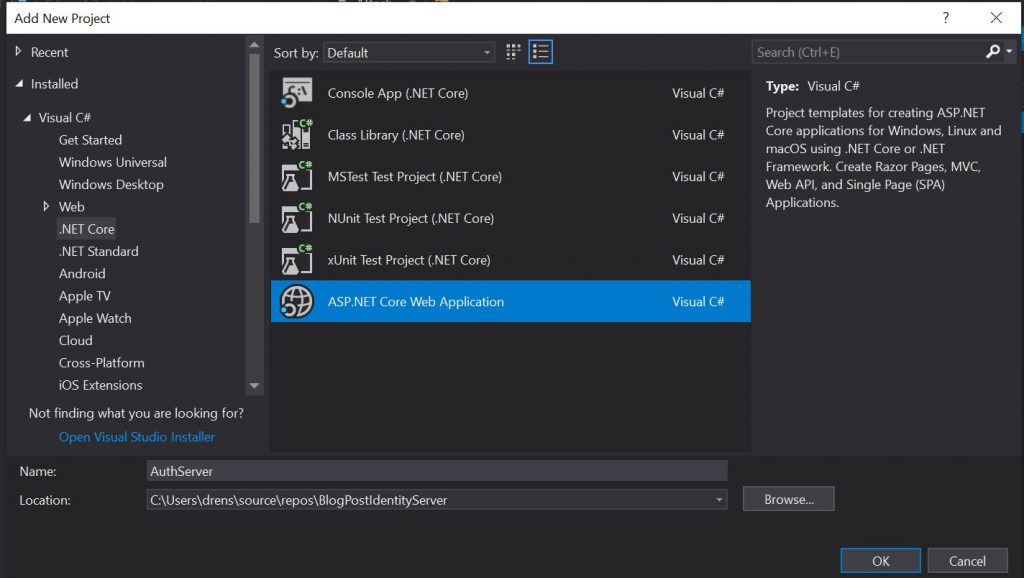
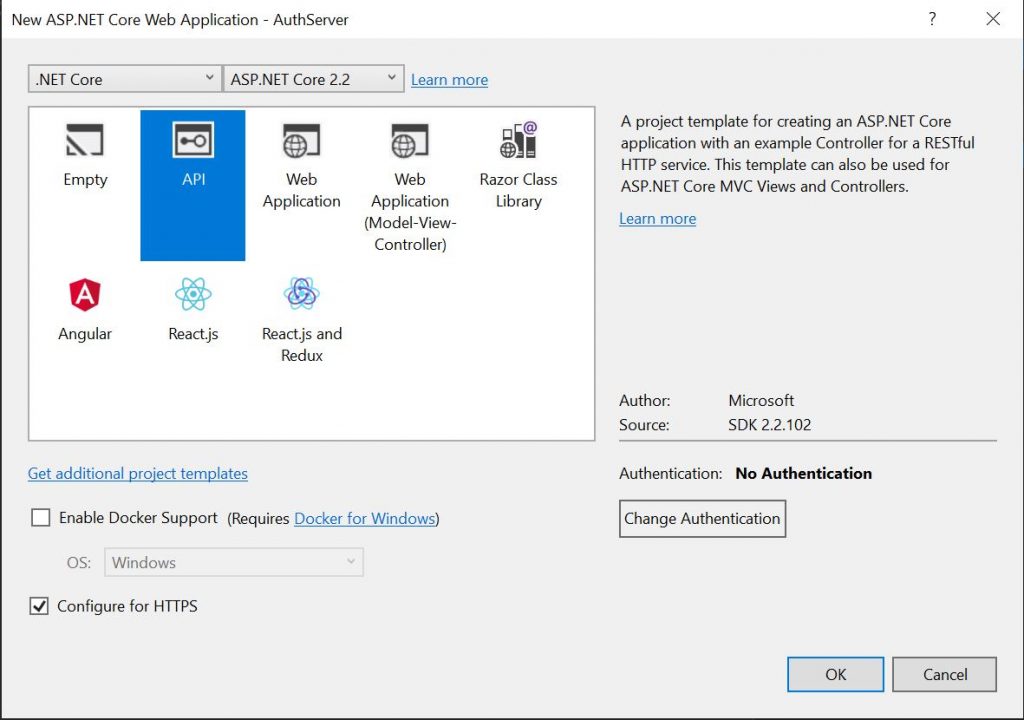
- In VS2017, select File / New / Project and select ASP.NET Core Web Application.
- Name your project AuthServer
- Select API and click OK to create your new API project.
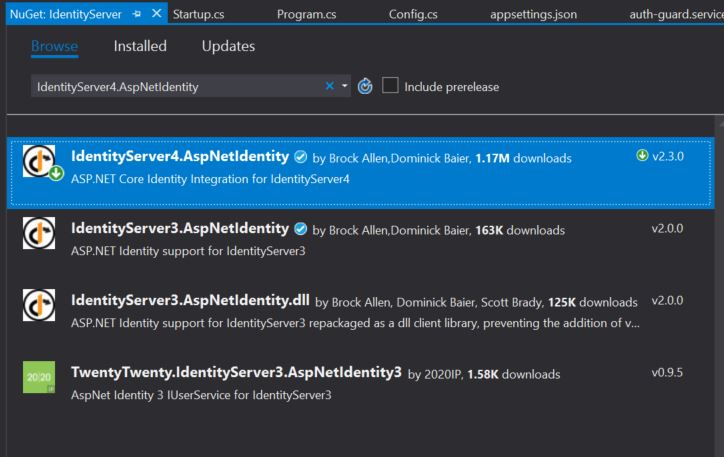
Now, in order for us to use IdentityServer4, we need to install it as a NuGet package. We do that by right clicking on our project and selecting Manage Nuget Packages…
Then, we find the IdentityServer4 package by typing IdentityServer4.AspNetIdentity
As a last step simply select the package and click install. This would install everything you need to start using IdentityServer4 as your authentication server.
Now we have everything we need to run our own authentication server. But first, let’s configure it.
Create new Config.cs class inside your project
public class Config
{
    // Clients allowed to access resources from Auth Server
    public static IEnumerable<Client> GetClients()
    {
        return new List<Client>
        {
            new Client
            {
                ClientId = "client",
                AllowedGrantTypes = GrantTypes.ClientCredentials,
                ClientSecrets =
                {
                    new Secret("secret".Sha256())
                },
                AllowedScopes = {"api1"}
            }
        };
    }

    // APIs allowed to access the Auth server
    public static IEnumerable<ApiResource> GetApiResources()
    {
        return new List<ApiResource>
        {
            new ApiResource("api1", "My Api")
        };
    }
}
Here, we configured our Client by setting a client id, and a secret, used for our token. Lastly, we named our API as api1. We’re going to need all this when we set up our client soon.
Now we need to add IdentityServer as a service and add it to our HTTP request pipeline.
To do that, open Startup.cs and inside ConfigureServices add the following:
public void ConfigureServices(IServiceCollection services)
{
    //other services...
    services.AddIdentityServer()
        .AddDeveloperSigningCredential()
        .AddInMemoryApiResources(Config.GetApiResources())
        .AddInMemoryClients(Config.GetClients());
    //other services...
}
This adds IdentityServer as a service to our ASP.NET Core app.
Next, inside Configure, we add the following:
public void Configure(IApplicationBuilder app, IHostingEnvironment env)
{
    if (env.IsDevelopment())
    {
        app.UseDeveloperExceptionPage();
    }
    else
    {
        app.UseExceptionHandler("/Error");
        // The default HSTS value is 30 days. You may want to change this for production scenarios, see https://aka.ms/aspnetcore-hsts.
        app.UseHsts();
    }

    app.UseIdentityServer();

    app.UseHttpsRedirection();
    app.UseStaticFiles();
    app.UseCookiePolicy();

    app.UseMvc();
}
app.UseIdentityServer() adds the IdentityServer middleware to our app’s request pipeline.
The position in which we add this is very important as it defines
the order in which that particular middleware component gets invoked. We want this middleware to be the first think that gets invoked (after the specific middleware for dev and production before it).
That’s it! We now have a fully functioning authentication server. We did it with a few lines of code, without worrying about Auth2.0 or OpenID Connect details. Thank you, IdentityServer!
Now, let’s create our Protected Resource that we’re going to access using JWT token.
For this you follow the same steps as those used for creating our authentication server at the beginning of this blog post. The only difference would be the name – name this API project ProtectedApi.
Now let’s create a fake users database. We’ll do that in the simplest possible way – by creating a controller that would hold a list of users that we’ll show to those who are authorized (possess a valid JWT token).
First, inside the root folder, let’s create a User.cs model that would represent our fake users.
public class User
{
    public int Id { get; set; }
    public string FullName { get; set; }
    public string Email { get; set; }
}
We’ll keep things simple – we’ll just hold the full name of every user and their email address.
Now that we have the user model, we need to create a controller. This controller would be our end point to which we’ll make our HTTP request to obtain our fake users list using HTTP GET request.
Inside the Controllers folder create a new class, called AuthController.cs
[Route("api/[controller]")]
[Authorize]
public class AuthController : Controller
{
    [HttpGet]
    public IActionResult FakeData()
    {
        var users = new List<User>
        {
            new User
            {
                Id = 1, FullName = "John Doe",
                Email = "[email protected]"
            },
            new User
            {
                Id = 2, FullName = "Elizabeth Johnson",
                Email = "[email protected]"
            },
            new User
            {
                Id = 3, FullName = "Bob Rogers",
                Email = "[email protected]"
            }
        };

        return Json(users);
    }
}
[Route(“api/[controller]”)] sets the request url to our fake database to api-domain/api/auth where auth is the name of the controller (it matches the controller name without the Controller postfix) and api is the same api string we set in the route attribute. If we set it to puppies/[controller] it would match puppies/auth. That simple.
[HttpGet] attribute makes the method responsible for handling all GET requests. Inside it we created a simple list of three users. In the real world here we’ll have some kind of service that calls a real database. However, for simplicity’s sake we’ll use a List.
In the end, we return a JSON with our users. Simple.
Now, by applying [Authorize] attribute to our class we’ve made it secure and at the moment nobody could get the list of users.
To test that, we’ll use Postman – a simple and powerful tool for testing APIs. If you don’t have it – download it from here and install it.
Let’s first change our Protected API port to 6001 (be default it would be 5001 in SSL). We’ll do that so that our IdentityServer would use port 5001.
To do that, inside Program.cs update Main to the following:
public static void Main(string[] args)
{
    CreateWebHostBuilder(args)
        .UseUrls("https://localhost:6001/")
        .Build()
        .Run();
}
Now, inside cmd, type dotnet run to run the project. It would start on port 6001.
So, let’s make sure that our API resource ( list of users )is now inaccessible.
Open Postman and choose a GET request. Set the request URL field to https://localhost:6001/api/auth
When you click Send you should get a 401 Unauthorized response back.
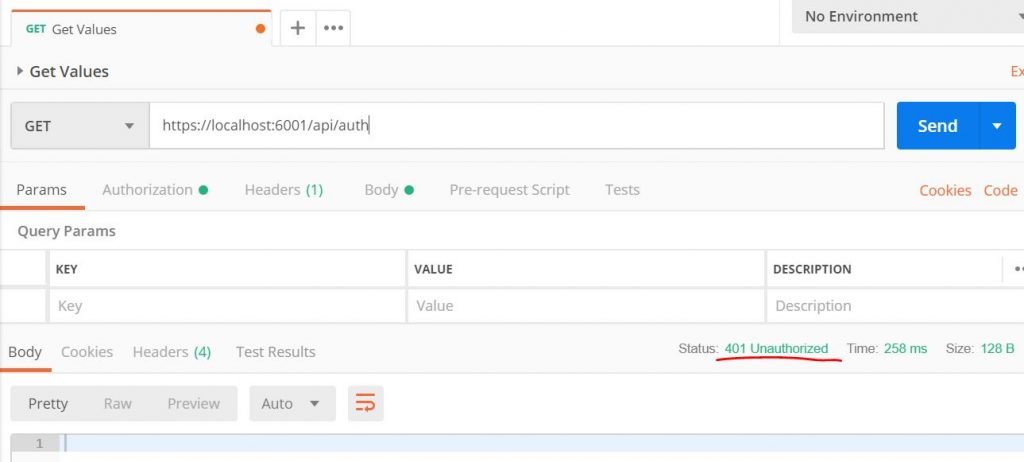
Great! Now our API isn’t available for unauthorized requests.
Let’s now authorize ourselves using JWT so that we could get our list of users.
First, we need to configure our protected API to “work with” our authentication server. To do that we’ll first need to install another IdentityServer package, called IdentityServer4.AccessTokenValidation. This, as it’s name suggests, is responsible for validating the token.
Let’s now “tell” our protected API about AuthServer.
Inside our ProtectedAPI project open Startup.cs and inside ConfigureServices add the following:
services
    .AddAuthentication("Bearer")
    .AddIdentityServerAuthentication(options =>
    {
        options.Authority = "https://localhost:5001";
        options.RequireHttpsMetadata = false;
        options.ApiName = "api1";
    });
This sets the default authentication scheme to “Bearer“, configures IdentityServer authentication by setting the url and port used by our AuthServer (IdentityServer) and the api name that we’ve set inside our AuthServer (api1).
Below all this let’s add the Authorization service.
services
    .AddMvcCore()
    .AddAuthorization()
    .AddJsonFormatters()
AddMvcCore adds the routing mechanism, AddAuthorization adds the authorization service and AddJsonFormatters allows us to work with JSON. Here the order doesn’t matter.
Inside Configure method add
app.UseAuthentication();
after the else statement (the same place as before). This allows us to use the authentication that we’ve set up above.
We’ve did it! Our protected API now is configured to work with our IdentityServer authentication server.
Let’s now run AuthServer via cmd by typing dotnet run
It should run at port 5001.
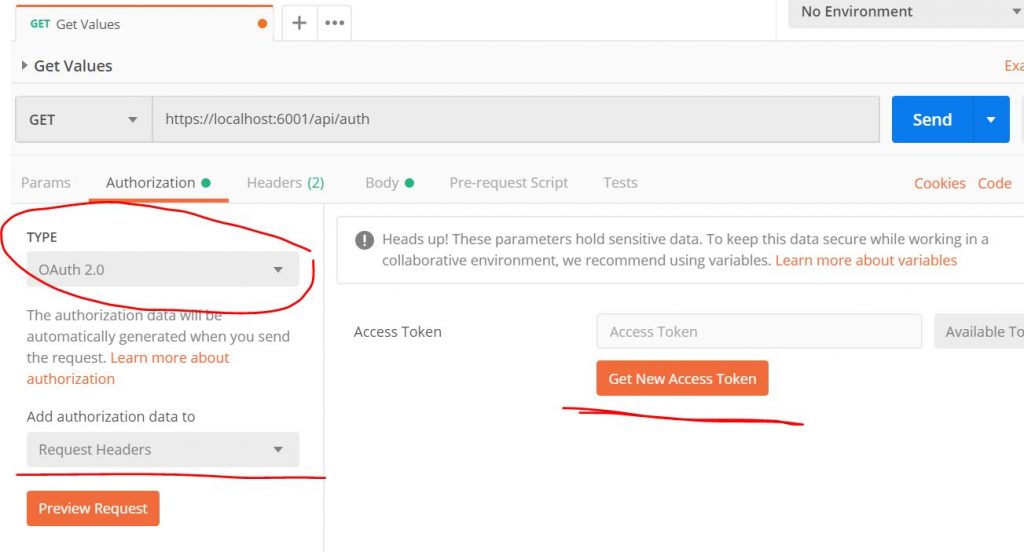
Final push. In order for us to be able to get the list of users inside our protected API we first need to obtain a JWT token from our AuthServer.
To do that we’ll request one from our authorization server.
Inside Postman click on Authorization and under Type choose OAuth 2.0. Then click Get New Access Token.
Here we should put the same stuff that we did in our configuration.
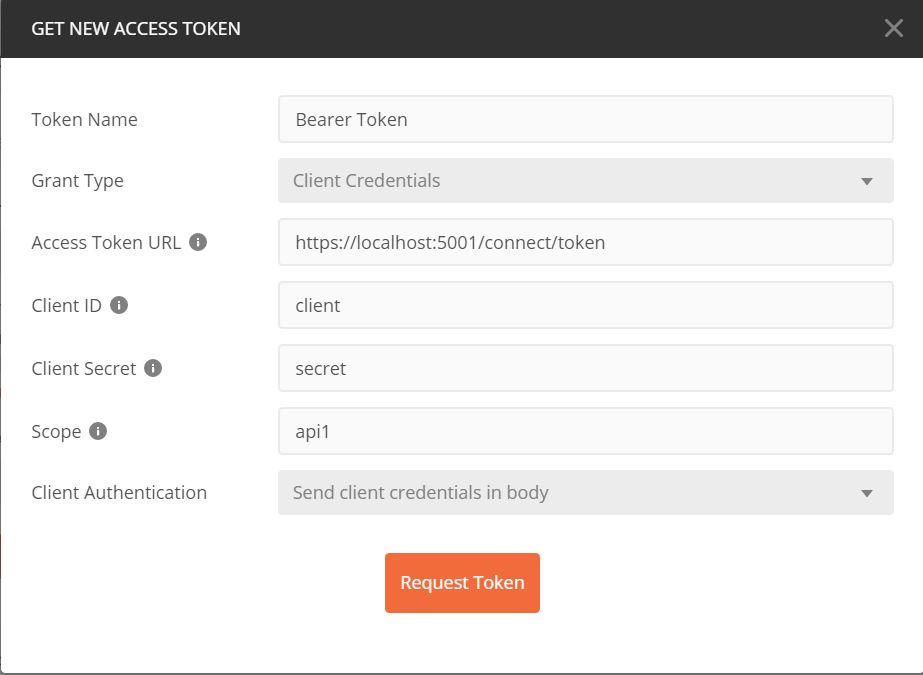
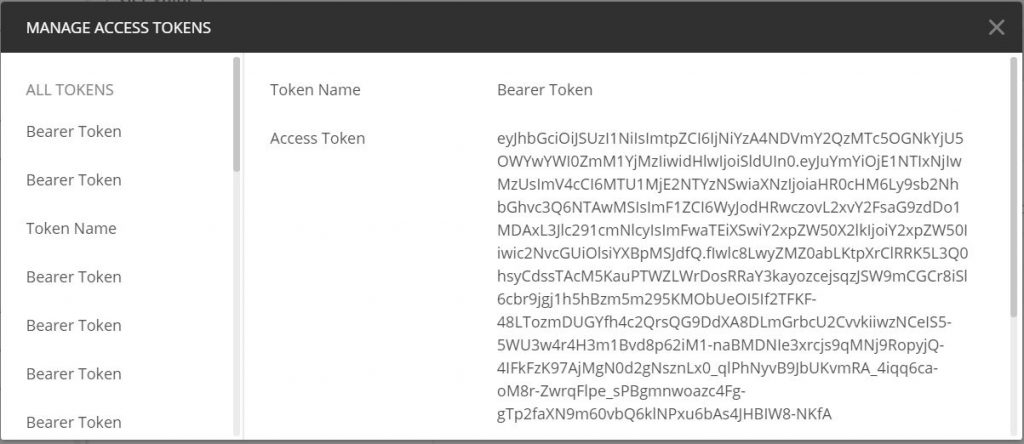
Click on Request Token and you should receive a JWT token back – copy it to your clipboard since we are going to use it in our next request to our Protected API.
Now, to make an HTTP Get Request we, again, type our end point, in this case https://localhost:6001/api/auth, and choose GET.
If we click Send now we’ll get an 401 Unauthorized response, just like before. We need to send the JWT token as part of our request.
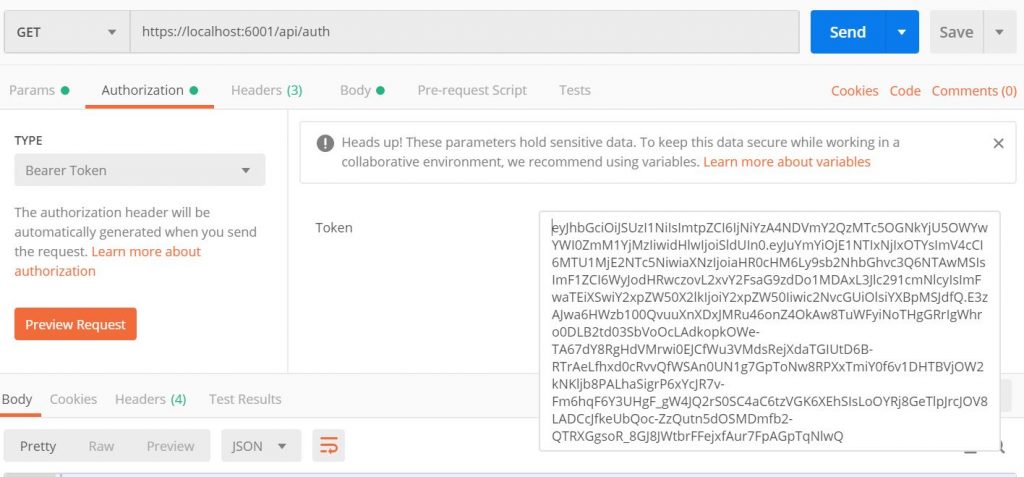
The process in Postman is rather simple – click on Authorization and under Type choose Bearer Token. Paste the token you’ve copied to where it states Token.
And now, the moment of truth, by clicking Send you will make an HTTP GET request to our protected api, but this time, as part of the request, you will send the JWT token which would get validated by .NET Core and if proven valid we will receive our list of users. And since our token is valid (we haven’t tried to modify it in any way) .NET Core is happy and in turn gives us our list of users back as a 200 response.
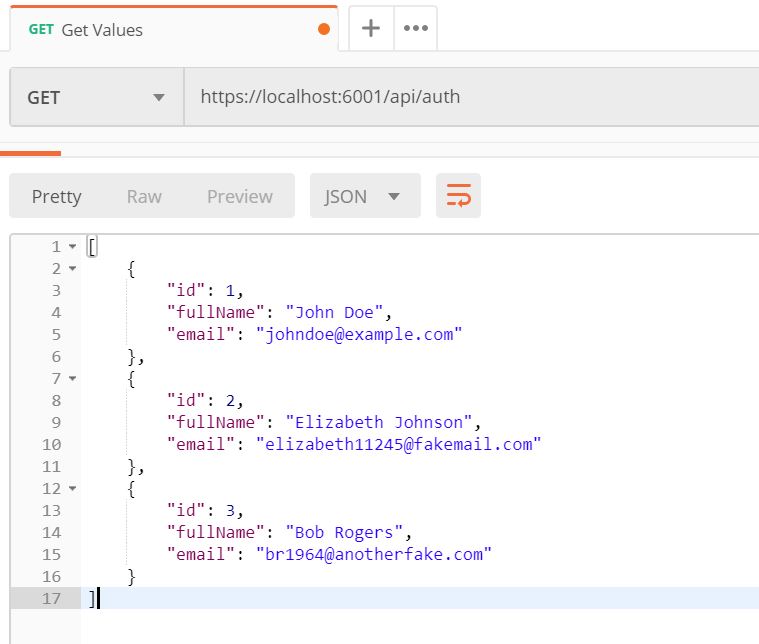
That’s awesome! We now have a protected API, thanks to IdentityServer.
I really hope this was useful.
Happy coding!


gooooooood article but I need to how to make refresh token process ..
Hi,
I have to implement the jwt token with api, client and auth using .net core. So auth will be used for authenticate the request and create the token.
So is there any example I can follow.
Thanks again
You have printing mistake
Instead of :
To do that, open Setup.cs and inside ConfigureServices add the following:
one must write:
To do that, open Startup.cs and inside ConfigureServices add the following:
Great catch, Ilya! Thank you!
It breaks in ASP.net Core 3 where Endpoint Routing is used, so you have to turn it off and use the older mvc routing and then these examples work.
ConfigureServices:
.AddMvcCore(options => { options.EnableEndpointRouting = false; } )
Configure
app.UseMvc();
//app.UseEndpoints(endpoints => { endpoints.MapControllers() });
Thank you for good article. It gives a good base to separation of Auth server from APIs services.
With .NET Core 3.1 in protected API project, it is not necessary to add IdentityServer4.AccessTokenValidation package.
My test solution looks like
Client app of course – Postman 🙂
http://localhost:9009 – Authentication service (IdentityServer4) with packages
IdentityServer4, IdentityServer4.AspNetIdentity and EF core related packages as I use it as Storage for ASP identity…..
http://localhost:5001 – Protected API
Only Microsoft.AspNetCore.Authentication.JwtBearer is installed
And ConfigureServices (Startup.cs in Protected API project) has the following configuration
….
services.AddAuthentication(opt =>
{
opt.DefaultAuthenticateScheme = JwtBearerDefaults.AuthenticationScheme;
opt.DefaultChallengeScheme = JwtBearerDefaults.AuthenticationScheme;
})
.AddJwtBearer(opt=>
{
opt.Authority = “http://localhost:9009/”;
opt.Audience = “api1”;
opt.RequireHttpsMetadata = false;
});
Such a minimal changes in protected API projects is a good reason to use IS4 as central token authority service
It works perfectly, thanks again for the idea.
Regards
Thank you for your input on the subject, Vlad! 🙂